Monday, April 18, 2022

Thank-you Creative Scrapbooker Magazine!

 Hi Friends,


I took part in a March challenge over on the VIP Creative Scrapbooker Facebook group and won a fabulous prize and a handmade card from Jackie.  It really is worth a membership over there. You get so much in return from free projects and content, group zoom crops, chances to win assorted prizes from amazing companies, a free apron for 2 consecutive membership subscriptions (3 months long, each) and so so much more :) And a big thank-you to Scrapbooking Fanatics for allowing me to use some of the design team products for this fun project 


Happy Creating,

Jessie

Tuesday, March 15, 2022

 Create Yourself!


I started a new art journal and decided that I should start it off with a page titled "Create Yourself". I believe in this turbulent world we need to show ourselves some self love, and show others patience, compassion, empathy and love!


I used a few elements out of Vicki Boutin's Color Study line, as well as one of the stamps and the stencils.


The other supplies used were:
Black Embossing Powder
Modeling Paste
Distress Ink in Black Soot, Squeezed Lemonade and Peacock Feathers
Unknown acrylic paints to color the modeling paste and unknown purple and yellow cardstock


Honestly, I just kept layering and layering until I loved the page. Remember, there are no mistakes in art, so enjoy yourselves and the process


Most of the supplies can be purchased at Scrapbooking Fanatics, including one of the Kits of the Month that I used ;)

Take Care Friends,   

                                                        Jessie

Tuesday, March 8, 2022

 Hi Friends,


    I created this one page layout for Scrapbooking Fanatics. I absolutely adore the colors and elements included with this kit. It may be a bit of an oldie, but is truly timeless and has so many options, from simple pages to layered pages to fun cards.

Our daughter loves cars now that she is an adult (I seriously call her for truck help....lol) and this line from Simple Stories called Simple Vintage Cottage Fields was perfect for the photos she had taken.  I'm tempted to head back into my scrap room and do tons more with this line. It is fabulous


It is available in the shop here 


Have a great day,
Jessie


Wednesday, March 2, 2022

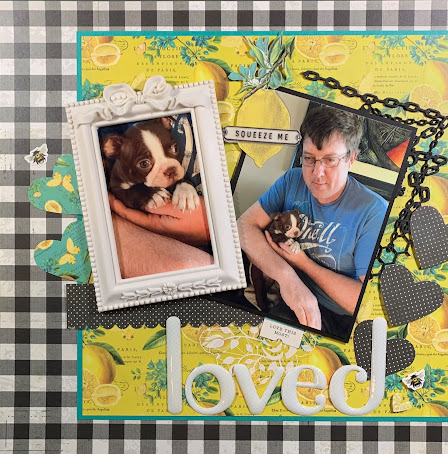
When Garth came into our lives

 We brought this little guy home not long before the photos were taken. Garth is a Boston Terrier that has added so much love to our lives. He's quirky, loving and very agile. He's now 6 ;)  I believe he also helped my husband, Jeff, immensely when our lives took a turn for the worst, although it was a blessing in disguise, with a partnership dispute and couldn't work for 6 months. Jeff became increasingly depressed and I went to work full-time so he was home alone with Garth and Cassie (our old girl, who is a Pomeranian cross). He took care of the household chores, cooking and minding after our 15 year old daughter (our son had left home already). I'm grateful Garth was in our lives and helped Jeff through the tough time. So "Loved" is a perfect title for this page.


I used a Simple Stories paper line called "Simple Vintage Lemon Twist".


Have a great day,
Jessie


Tuesday, March 1, 2022

How to Color Easter Eggs with Alcohol Inks


I did this up quite a few years ago, but I thought I'd share it as Easter is coming soon ;)


The supplies needed are as follows:

- eggs (I suggest using blown out eggs so you get longer use of them)
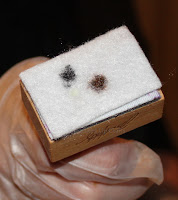
-  2 or 3 colors of alcohol inks  (I used Espresso, Raisin, Pesto and           Butterscotch)
-  1 or 2 mixative colors ( I used Copper and Pearl)
-  alcohol blending solution
-  Ranger applicator tool and replacement felts
-  optional:  rubber gloves, pair of kitchen tongs


Instructions:


1.  Apply a new replacement felt to your applicator tool;  add 2 drops of color to the felt and lightly dab onto the egg;  continue to dab color onto your egg until you are satisfies with the coverage.  (You may need to add more ink to you felt as it will evaporate; I just added the same colors to the same spots on the applicator felt and then continued to dab the egg).


2.  Replace the felt on your applicator (you may use the used felt with similar colors once it is completely dry).

3.  Apply the same 2 colors to your felt as you used in step 1;  apply one other color as well as a drop of metallic mixative; Continue to dab onto your egg until satisfied with the coverage.

4.  Replace the applicator felt.

5.  Now add 1 color that you used in step 1 as well as a small amount of the mixative color;  Add a very small amount of the alcohol blending solution to the applicator felt as well;  As in previous steps continue to dab the egg until you are happy with the coverage.


6.  Let Dry and there you have it :)


For some more fun I thought I would use kitchen tongs to go ahead and hold my egg for me while I dropped very small amounts of ink (a few different colors as well as a mixative color) onto a new clean egg. I let the ink drops run at will and sometimes would manipulate where the ink ran by moving the egg around or even blowing on the drops. I started off by dropping one color at a time at random spots, then continued on with the second color, then the third and finished off with the metallic mixative. (The metallic mixative will work best if you drop it onto a spot that is still a bit wet from the last drops of ink).


Just remember to have some fun and experiment...... there are no mistakes, only creations!